Creating & Editing

Contents
Creating a Request for Information

| • | Click on Create New RFI icon |
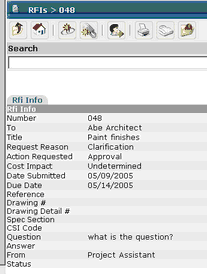
| • | RFI Info screen comes up |
| • | Number – defaults to next sequential number; cannot be modified |
| • | From – defaults to user name creating the RFI |
| • | To – defaults to GC PM if sub entered, or to Arch PM if Contract; can be modified |
| • | Subject – insert subject of RFI ( This will show in email notification ) The Key to notifications going out is that when you are done filling in this form you click Transmit. |
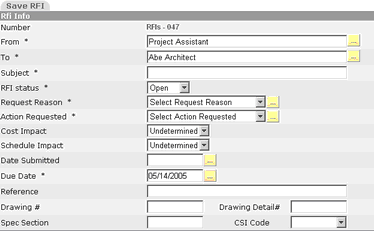
| • | RFI Status – select Open, Closed, Pending. You also have the option to customize the RFI status. See List Management Module. Select Project Setup, List Management |
| • | Request Reason – select reason via drop down box |
| • | Action Requested – select action via drop down box |
| o | You have the option to customize the Request Reason and Action Requested fields. |
| ▪ | Click on the gold button |
| ▪ | Insert the applicable request reasons or action requested and click the Add button |
![]()
| • | Cost Impact – select via drop down box |
| • | Schedule Impact – select via drop down box |
| • | Date Submitted – date will populate when you transmit RFI |
| • | Due Date – defaults to date per project defaults |
| • | Reference – insert if required |
| • | Drawing # - insert if required |
| • | Drawing Detail # - insert if required |
| • | Spec Section – insert if required |
| • | CSI Code – insert if required |
| • | Question – insert RFI question |
Options To
| • |
![]()
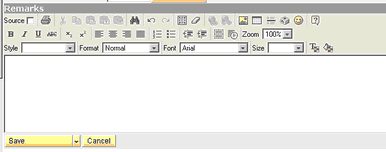
| • | Add CCs |
| • | Attach a File |
| • | Attach a Document |
| • | Fax |
Note: The CC field located in the middle of the form is a smart field. Insert the cc by typing in the first several letters of the person’s last name. (the person must be attached to the project member list.)
To Transmit the RFI
| • | Once the RFI is complete you must use the Transmit feature. Transmitting the RFI will update report tracking dates. If the transmit option is not used, the report data will be incorrect. |
| • | You have two options for Transmitting – Individual and Multiple |
| • | Individual – Transmit from the RFI Create screen |
| • | Click on the Transmit Icon to transmit |
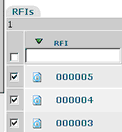
| • | Multiple – Transmit from the RFI Summary Screen – click in the selection boxes to the left of the RFIs you wish to transmit – Click the Transmit Icon |
To Print an RFI
| • | Click the print icon |
To Close the RFI
| • | Save – Save the RFI |
| • | Save & New – Saves and creates a clean screen |
| • | Save & Copy – Saves and create a copy to revise for the next RFI |
| • | Update – Once an RFI has been initially saved, the Save button will be shown as the Update button. |
Receipt of a Transmitted RFI – Notifications of RFIs can be sent electronically, they can be faxed, found in your Task Manager or go to the RFI screen which will show a list of all RFIs.
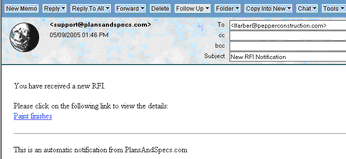
Email Notification
| • | Click on the notification link |
| • | This will take you into Plans and Specs |
| • | You can print the RFI by clicking on the Print Icon |
